What is Drip Edge on Your Roof? A Comprehensive Guide
If you’re a homeowner or planning to build a new house, you’ve likely come across the term “drip edge” in roofing discussions. But what exactly is drip edge, and why is it so important for your roof? In this article, we’ll explore everything you need to know about drip edge, its benefits, types, installation process, and maintenance. Let’s dive in!
Understanding Drip Edge
What is Drip Edge?
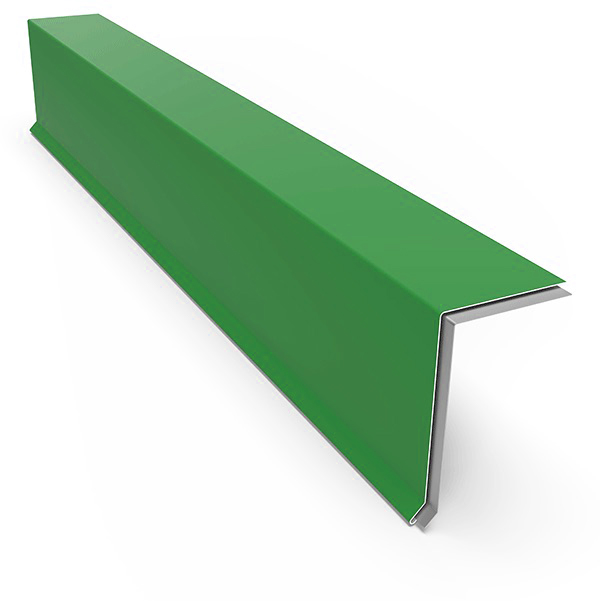
Drip edge is a metal flashing that is installed at the edges of your roof to direct water away from the fascia and into the gutters. It’s an essential component of a roofing system, ensuring that water does not damage the underlying structure of the roof.
Why is Drip Edge Important?
The primary purpose of drip edge is to protect your home from water damage. Here are some key reasons why drip edge is crucial:
- Prevents Water Damage: Drip edge prevents water from seeping into the roof deck and fascia, which can lead to rot and other structural issues.
- Guides Water Into Gutters: It directs rainwater and melting snow into the gutters, preventing water from dripping down the sides of your house.
- Enhances Roof Lifespan: By keeping water away from critical areas, drip edge helps extend the life of your roof.
- Aesthetic Appeal: Drip edge gives your roof a finished look, enhancing the overall appearance of your home.
Types of Drip Edge
Drip edge comes in various materials and styles, each offering different benefits. Here are the most common types:
1. Aluminum Drip Edge
Overview:
- Aluminum drip edge is lightweight, corrosion-resistant, and easy to work with. It is available in various colors to match your roof.
Benefits:
- Corrosion-Resistant: Ideal for areas with high humidity or salt air.
- Variety of Colors: Can be painted to match your roof.
- Lightweight: Easy to install and handle.
Considerations:
- Strength: Not as strong as other materials, may not be suitable for areas with heavy snow or ice.
2. Galvanized Steel Drip Edge
Overview:
- Galvanized steel drip edge is coated with zinc to prevent rusting. It is strong and durable, making it suitable for harsh weather conditions.
Benefits:
- Durability: Extremely strong and can withstand heavy snow and ice.
- Rust-Resistant: Zinc coating prevents rusting.
- Cost-Effective: Generally more affordable than aluminum.
Considerations:
- Weight: Heavier than aluminum, can be more challenging to install.
- Appearance: Limited color options compared to aluminum.
3. Copper Drip Edge
Overview:
- Copper drip edge is known for its durability and aesthetic appeal. Over time, copper develops a patina that adds a unique look to your roof.
Benefits:
- Aesthetic Appeal: Adds a distinctive, elegant look to your home.
- Long-Lasting: Can last for decades with minimal maintenance.
- Patina Formation: Protective patina prevents further corrosion.
Considerations:
- Cost: More expensive than aluminum and galvanized steel.
- Oxidation: Regular cleaning required to maintain the shiny look.
Drip Edge Profiles
In addition to materials, drip edge comes in different profiles to suit various roofing needs. Here are the most common profiles:
1. L-Shaped Drip Edge
Overview:
- The L-shaped drip edge has a simple, right-angle design that fits snugly over the edge of the roof.
Benefits:
- Easy to Install: Simple design makes it easy to install.
- Versatile: Suitable for various roofing materials and styles.
Considerations:
- Basic Protection: Provides basic protection but may not be suitable for roofs with steep slopes.
2. T-Shaped Drip Edge
Overview:
- The T-shaped drip edge features an extended flange that provides extra protection for the roof edge.
Benefits:
- Enhanced Protection: Extended flange offers additional protection against water infiltration.
- Suitable for Steep Slopes: Ideal for roofs with steep slopes where water runoff is heavy.
Considerations:
- Installation Complexity: Slightly more complex to install compared to L-shaped drip edge.
3. C-Channel Drip Edge
Overview:
- The C-channel drip edge has a curved design that channels water away from the roof edge.
Benefits:
- Superior Water Management: Curved design effectively channels water into the gutters.
- Aesthetic Appeal: Provides a sleek, finished look to the roof edge.
Considerations:
- Installation: Requires precise installation to ensure proper water management.
How to Install Drip Edge
Installing drip edge correctly is crucial to ensure it performs its intended functions. Here’s a step-by-step guide to installing drip edge on your roof:
1. Gather Your Tools and Materials
Before you start, make sure you have the following tools and materials:
- Drip edge (in your chosen material and profile)
- Roofing nails or screws
- Hammer or drill
- Tin snips or metal cutting tool
- Measuring tape
- Chalk line
- Ladder
- Safety equipment (gloves, goggles, etc.)
2. Prepare the Roof Edge
Ensure the roof deck is clean and free of debris. Remove any old roofing material or damaged wood.
3. Measure and Cut the Drip Edge
- Measure the length of the roof edge and cut the drip edge to size using tin snips or a metal cutting tool.
- For corners, cut a 45-degree angle on the overlapping pieces to ensure a seamless fit.
4. Install the Drip Edge
- Start at the bottom edge of the roof and work your way up.
- Position the drip edge so that the outer edge hangs over the gutter.
- Secure the drip edge with roofing nails or screws, placing them about 12 inches apart.
5. Overlap the Pieces
- Overlap the pieces of drip edge by at least 2 inches to ensure a continuous barrier.
- For corners, ensure the drip edge pieces meet snugly to prevent gaps.
6. Seal the Joints
- Use roofing cement or sealant to seal the joints and corners, ensuring no water can penetrate through the gaps.
7. Install the Roofing Material
- Once the drip edge is installed, proceed with installing the roofing material, ensuring it covers the drip edge properly.
Maintaining Your Drip Edge
Regular maintenance of your drip edge is essential to ensure it continues to protect your roof effectively. Here are some maintenance tips:
1. Regular Inspections
- Inspect your drip edge at least twice a year, preferably in the spring and fall, to check for any signs of damage or wear.
2. Clean the Gutters
- Keep your gutters clean and free of debris to ensure proper water flow. Clogged gutters can cause water to back up and overflow, potentially damaging the drip edge.
3. Check for Loose Nails or Screws
- Ensure all nails or screws securing the drip edge are tight and in place. Loose fasteners can cause the drip edge to shift, reducing its effectiveness.
4. Look for Signs of Rust or Corrosion
- For galvanized steel and aluminum drip edges, check for signs of rust or corrosion. If you notice any, clean the area and apply a rust-resistant coating.
5. Seal Any Gaps
- Check for gaps or openings in the joints and corners of the drip edge. Use roofing cement or sealant to fill any gaps and prevent water infiltration.
Frequently Asked Questions About Drip Edge
Do I Really Need Drip Edge on My Roof?
Yes, drip edge is essential for protecting your roof from water damage, preventing debris buildup, and directing water into the gutters. It also enhances the overall appearance of your roof.
Can I Install Drip Edge Myself?
While it’s possible to install drip edge yourself, professional installation is recommended to ensure it is fitted correctly and performs its intended functions.
How Often Should I Inspect My Drip Edge?
Inspect your drip edge at least once a year, in the spring and fall. Additionally, check it after severe weather events to ensure it has not been damaged.
What Should I Do If My Drip Edge is Damaged?
If you notice any damage to your drip edge, such as rust, corrosion, or loose fasteners, repair or replace it promptly to maintain its protective functions.
Can Drip Edge Be Replaced Without Replacing the Entire Roof?
Yes, drip edge can be replaced independently of the roofing material. However, it’s often more convenient to install or replace drip edge during a roof replacement or major repair.
Conclusion
Drip edge is a small but vital component of your roofing system, providing essential protection against water damage, debris buildup, and animal intrusion. By understanding the different types of drip edge and how to install and maintain them, you can ensure your roof remains in excellent condition for years to come.
Whether you opt for aluminum, galvanized steel, or copper drip edge, make sure to choose a material and profile that suits your climate, aesthetic preferences, and budget. Regular inspections and maintenance will keep your drip edge functioning effectively, protecting your home from the elements.
For more information or to get a professional assessment of your roofing needs, contact us today. We’re here to help you keep your home safe and dry, no matter the weather.